Color Throwdowns Sketches My NON-TAC Blog My Family Ramblings and Photos

Tuesday, July 26, 2011

August Card Club...New Leaf...

Hello stamping friends, for the next few days, I'm going to be sharing some cards I've made using the new August Card Club Bonus set that Card Clubbers can purchase at a discounted rate with a qualified purchase.  During my card club event in August, you will have the opportunity to play with this set and see how versatile it is.  So today, I'm sharing my first few cards...
This was my first card created using the set.  It was really a hodge-podge of embellishments and I even did some braiding techniques that I used to do when I was a teenager (remember those floss bracelets?)  The button I wove into the twine is a backwards shell button.  I Loved the color and the texture of the back side! 
Here you can see the glossy paper I used.  I also incorporated some of my favorite rub-n-buff and spackling tape to add those sparkly circles...YUM! 
I stamped the leaves using white ink then sponged fall colors over that to create the background. 
I LOVE this simple layout and the little pop of pattened paper! 
I wanted to create a flower-like effect with the leaves...and added some clear ultrafine glitter too...It's real SPARKLY! 
The Kraft background was stamped with Versamark using one of my new background favorites! 
Adding a little punched edge to the bottom border just give it the finishing touch!!!

Hope you enjoyed the peek at the August Card Club Set:  Happy Leaf!  Check out the other creations on the Savvy Projects Blog too...You'll really be inspired!!!  Kerry

Monday, July 25, 2011

August Card Club....Workin' on cards...

Hey friends,

I'm working on some card club samples and happened upon the newest download...Check out the sketches that will inspire my card club projects: 
SO wanna have some fun???  Card Club will be held the second Saturday in August...Wanna come???  I'll be back to share what we'll be making soon!

Friday, July 22, 2011

As seen in the 2011-2012 TAC Inspiration Catalog

Introducing...Brandy and Emma...

Oh this kiddo and her pooch collection by Phyllis Harris has to be one of the BIGGEST hits in the whole catalog right now.  I think everyone loves this little girl and her adventures with her adorable pooch Brandy...or is it Emma?  Well, either way, they are sooooo cute! 

 Coloring these images brought back some bittersweet memories of me when I was about 6 or 7 and a long drive to the country to give a farming family my precious pooch.  My family was moving and for some reason, couldn't take her with us.  I'll never forget it!  That drive, the long gravel road, the barn, the goodbye puppy hug...are etched into my memory forever! 
And here is another card that didn't make the catalog but boy, did I love coloring the pooch in grays...I wanted the focus to be on the sentiment...and the pooch was delivering the message perfectly.  PS...This card was on display at Seminar and some stranger came up and bought it right off the display board!  Too shocking!


Tuesday, July 19, 2011

Followed...

I joined the world of TWITTER about a month ago and was followed by a Christian Articles Resource from Shane Trusty (@ChristianArtcls)...Visited and found some amazing poetry...Here's one that called to me: 

(I recommend playing "IN GODS HANDS" by NATALIE GRANT-in my Playlist while reading this.)


Faith in God

As I found myself doubting yesterday,
wondering what would become of me.
You came to rescue me in my crisis,
for you did hear my cries and pleas.

You never have forsaken me dear Lord,
as each day my daily bread you did give.
While teaching me silently to wait on you,
you were also showing me how to live.

For our lives are never ours alone,
since they all really belong to you.
So we should fully trust, never wavering,
always having faith in what you do.

And though sometimes I become so weak.
often wondering where my faith does dwell.
I will always stand firm on your Holy Word,
that true faith in you will never fail.

By Wendell A. Brown

Final Video...Coptic Stitch Book

Hello everyone,

I've finished my book and it's now available for viewing!!! Check out this video...wait until the end because I have photos too! Enjoy.

Sunday, July 17, 2011

Part 2 of Coptic Stitch Book NOW LIVE!

Hey stamping friends,
Here's part two of my Coptic Stitch book tutorial.


Part three will be shown tomorrow...ALL FINISHED!

Saturday, July 16, 2011

Coptic Stitch Video Tutorial...Part 1...Now Live...

Hey stamping friends, I uploaded Part 1 of my Coptic Stitch Video Tutorial today.  You can check it out HERE: 
TIP: Scroll down and turn the music player off...then you can hear the video. ")


I'll be back tomorrow (hopefully) to post Part 2, then on Monday, I'll share pictures of the finished book-stamped and embellished!

Kerry

Friday, July 15, 2011

Christmas in JULY!

On Tuesday I said I would have a special TREAT for you...Everyone Loves GIFTS right?  Nothing better than a gift of RUBBER right???  Well, today I'm finishing off Christmas in July with a little card and a gift for one lucky reader...You'll have to follow some directions though...
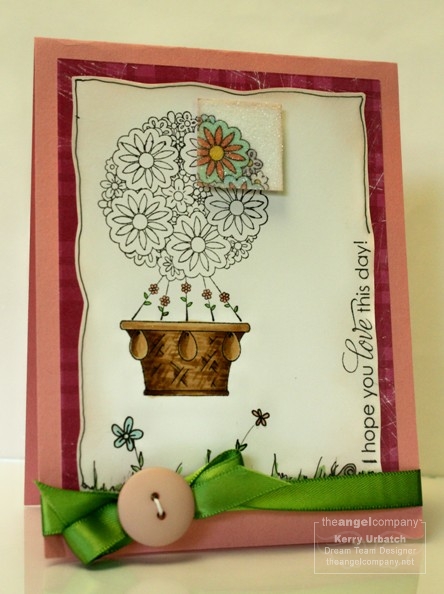
When coloring this little girl, I was thinking about how I was going to display her.  She needed some sort of Christmas scene for sure.  Since there was nothing in the set that spoke Christmas (more spring flowers in the set), I decided I needed to doodle my own scenery...Sooooo...Got out my Copic .35 Multiliner pen (works perfectly for Copic coloring afterwards) and doodled some cartoon-like images. 

*  First something to ground this little girl...grass.  Colored that with my Copics then cut it out.  Added some pop dots and set it aside. 

*  Then I made the thinking bubble.  I thought the card wouldn't speak "Christmas" without some sentiment...So the little girl "SPOKE".  Every cartoon needs a thinking bubble, right?  Doodled that and cut it out.  Used my Copics to add some contrast.  Added a pop dot and set it aside. 

* After preparing my images, I started moving them around on a white background...I liked the little girl in the position she's in on the card, but I felt there was a lot of space to her left so...I HAD TO FILL IT IN!  I doodled a Christmas ball, colored it in and cut it out.  Placed it in position (without glue) and surveyed the look...I LIKED IT. 

*  The white background was WAY too bright so I decided to do my favorite sky coloring technique to tone the white down a bit.  LOVED IT!!! 

* Finished...NO...Something wasn't right....I thought about cartoons and decided to outline the image like a cartoon frame.  Worked perfectly for these cartoon-like images.  OK...So cut the whole thing out. 

* In selecting a card base, I knew I wanted the image to be the focus...that's all the card needed...So put it on some black cardstock and the whole scene just POPPED!  LOVED IT!!!!

Details: 
Stamps:  T-3263 Brighten Your Day, T2144 Trendy Greetings
Ink:  Memento Tuxedo Black, Copic .35 Multiliner Pen
Copics: 
Skin:  E00, 01, 50
Hair:  E21, 34, 35, 57
Dress, bows, ball stripes: R02, 14, 22, 24
Ball holder:  Y15; YR23;
Grass/Ball/Dress:  G24, 40, 82; YG 06, 21
Sky:  BG0000, B0000
Paper:  Copic Xpress It Card, Bazzill Raven Cardstock

DON'T BE AFRAID TO DOODLE.....I doodle because the images I stamp start to build a story...I doodle to share that story and to make it come to life...

So there's my process...Now the GIFT...I'm giving away this stamp set to one lucky person!  In the comment section, share your thoughts about doodling...Do you do it?  Why do/don't you doodle?  When do/don't you doodle?  I'll pick one lucky winner and on the last day of July, I'll announce the winner.  It's that EASY!!! 

Thursday, July 14, 2011

Coptic Stitch Christmas Book...

Well, I had all intentions of posting my completed project today but...AHHHH....It's not done yet.  The book itself is made, just kinda blank...So...Tomorrow's another day. I'm making a video tutorial of the stitching technique so I had to practice stitching on camera-BLURRRRRRYYYYY...I need a good zoom camera. 

As promised, my final project (not including my Coptic Stitch Christmas Book) will be posted tomorrow.  There's a TREAT so make sure to check it out!!! 

Kerry

Wednesday, July 13, 2011

Christmas in July...More for my Box!

 Hello again!  I'm so having fun with Christmas In July.  My box is making me HAPPY!!! I'm so thrilled that I am getting a head-start on my Christmas Cards this year.  This card is pretty simple and easy to mass produce, for sure!!!  I used one of my new favorite background stamps to create the bottom border with my Kaleidacolor pad.  The sentiment was stamped in Memento Danube Blue.  When my card was finished, I thought it looked a bit flat so I added some Crystal Stickles to give it more POP! 

Stamps:  T3495 For Everything, Trendy Greetings
Ink:  Kaleidacolor Memento Danube Blue
Caboodles cardstock
Colored Cardstock: The Paper Company:  Aegean Sea
Ribbon:  Offray
Stickles: Crystal

Now here's another take on the same design...Just added a Spellbinders/Martha Stewart Snowflake and colored/cut the lady from Who Am I.  I'm not sure I like it or not, but maybe it'll grow on me...
The sentiment comes from the new set Dotted Peony by Nina Brackett.  That verse always makes me think of the songs we sing at Christmas Eve Services.
I stamped the skirt onto the blue cardstock then colored to shade it with Copics.  I also added Stickles to her shirt.  Oh, yeah...I added a nose too...I didn't like that she looked like her nose froze off!!!
Details: 
Stamps:  T3495 For Everything, TB3488 Who Am I, RN-2 Dotted Peony
Ink:  Kaleidacolor S017 Blue Breeze, SC900 Memento Tuxedo Black
Caboodles Cardstock
Copic Xpress It Card
Copics:  B00, 02, 28, E00, 01, 50 
The Paper Company:  Aegean Sea
White Ribbon:  Offray
Spellbinders Snowflakes and Martha Stewart Snowflake
Making Memories bling brad
Diamond Stickles

I'll be back tomorrow with another card for my Christmas Box...Stay tuned!

Tuesday, July 12, 2011

Christmas in July...

Hey Savvy Stampers!  This week is all about CHRISTMAS IN JULY...So get ready to FILL YOUR CHRISTMAS BOX FULL OF CARDS!!!!

I'm hosting the Savvy Projects Blog today so head over there to find out more about the three Christmas cards I created using NEW sets from our catty...Gotta love going to Seminar and coming home with a LOAD of stamps...I'm in inky heaven!!! 

Card #1:  Boughs of Blessings
My goal for all three cards was to use non-traditional sets for Christmas cards.  I love to create cards with particular family and  frends in mind. so these cards were created for some special people in my life.  When you really know someone, you can create something extra-special!   I'm really excited that I'm getting a HEAD START on my Christmas Cards this year too!!!
Stamps Used:  RN-13 Beautiful Lace, TA-3480 Circles of Love, T-2144 Trendy Greetings
Other:  Ribbon:  Offray, Ribbons and Bows Oh My, MM Brad, Martha Stewart Microfine Glitter, Bling/Button Michael's, Twig:  My tree!

Card #2:  HANGING WREATH?  It can't be! 
I first thought of this idea when I saw this set at Seminar.  I had envisioned a clean and simple design. Again, this card was created for a family member who is very traditional yet LOVES clean and simple lines.   
Stamps used:  TA 3478 Dotty Flowers
Ribbon:  Offray, MM mini brads, Bling:  Michael's
Card #3: HO HO HO...OH NO!
I selected just the top portion of the Santa hot air balloon...Perfect for this CAS card. I loved the formality of the sentiment, so this is for a special "Sophisticated"child at heart... 
Stamps Used:  TC-3489 Love This Day, T-3490 Love Lines
Memento Tuxedo Black Ink
Copics:  E01, E50; R02, R14, R24; BG0000, C00, C02 
Bazzill Red, Raven, Copic Xpress it Card
Ribbon:  May Arts

Check out Savvy Projects Bloggers (Design Team sister's blogs) for additional Christmas Inspiration: 
ME (Tuesday)
Michelle McDaniel (Friday)

I'll be back tomorrow to pull a few more projects out of my Christmas Box...I hope you find some time to stop by! 

Color Throwdown #6...

Hey Stampers!  It's that time of the month...No...Not that time, but much BETTER!!!   LOL...

I'm back to post a new COLOR THROWDOWN and am here to announce the winner of Color Throwdown #5.  Thanks to all those who participated...With the reveal of the new 2011-2012 Inspiration Catalog and a FREE stamp set up for grabs, I'm hoping there will be many more participants to come.  As you can imagine, shipping of these new products is a bit delayed, but I'm sure you'll be waiting with baited breath...Just don't beat down the UPS driver!!! 

And the winner of Color Throwdown #5 is....
That means that CassieT  is the winner.  Congratulations!!!  Please email me for further instructions.

And NOW on to Challenge #6...
Since we're celebrating Christmas in July, I thought I'd select some traditional colors that are representative of the holidays...Rich Rich Red, Gorgeous Green, Soft Suede, Yummy Cream.  Deelish huh?


Remember, all you have to do to participate in my challenge (without disqualification) is: 

*Create a NEW and original card incorporating the colors in my challenge. 
*Must incorporate STAMPING.
* Your card/project should be entered into no more than 3 other blog challenges.
*Use inlinkz below and post card
*Comment on this post


Monday, July 11, 2011

Christmas in July!

Join the fun this week as we prepare for the Holiday Christmas Card season by making cards, cards, cards and maybe a project or two! Check out the Savvy Projects Blog each day this week to see inspriational designs to get you into the SPIRIT! 

I'll be back every day this week to share what's been placed in my Christmas BOX... so stay tuned.  I'll even have a special TREAT for you on Friday! 

Kerry

Friday, July 8, 2011

Technique Showcase: Spotlighting

Hey stampers! I hope you're enjoying the Technique Blog hop today on the Savvy Projects Blog. I don't often do "Spotlighting" because I really enjoy coloring...It's hard to hold back and leave things blank then add a spot of color...So my card today was a challenge!  I compensated with the addition of my favorite things:  GLITTER, RIBBON, BUTTONS and DOODLES!

I decided to step away from the traditional CIRCLE spotlight because my image was already really "circly". I thought to give it a bit of contrast and to pull in the shape of the card, I'd use an inchie shape...Sooo...Here's the finished product (with a bit more coloring and a few doodles...PS...See the snail peeking through the grass???)
I'm loving the pink and lime green combo!

Check out the doodles...see the little snail peeking through.  Just enough doodles as to not distract from the focal image...MMMMM...I LIKEY! 

Stamps Used:  TC3489 Love this Day, T3490 Love Lines
Ink:  Memento Tuxedo Black,  Copic Multiliner .03 and .35 for the doodles
Copics Used: 
Basket:  E21, 33, 35, 37
Grass and leaves:  G14
Spotlighited (Is that a word?) inchie:  YR31; B00, G00, RV42, BV31
Martha Stewart Clear Microfine Glitter


Wednesday, July 6, 2011

As seen in the 2011 Inspiration Catalog...Be Fabulous...

Over the next few days I am going to be posting some photos of the 10 cards *yes-SHOCK* I have published in the new TAC 2011 Inspiration book. I was so honored to have had the opportunity to have a sneak peek of the awesome images to debut in the catalog and so excited to work with them. I've already placed my first order and WOW...not much left after my first shopping spree!!!
Be...
A very simple layout...The detail is in the image, the distressing and the coloring.  A bit of stickles was added to the centers of the flowers and the wings on that bee...
I just love distressing blue Bazzill paper with white ink.  It makes it appear a bit like denim...PERFECT for thise flowers.  The background was such fun to color with my copics too.  Because of the relaxed feel I got from the image, I was able to relax a bit with my coloring to just focus on light/shadow and depth.  I really
liked the trellis design (also available in stamp set form) in the background.  

A closer look at the blue paper and the coloring.  Click to see it in closer detail.  Stitching over the ribbon made the ribbon feel purposfully placed, not an afterthought.  Tracing a black line around the Be. sentiment tied it in with the focal image. 


Version 2:  WHO YOU ARE...
For this card, I pulled from the same palate and the same supplies but added a little graphing paper to the layout.  Additional doodling was added around the sentiments and the white base. 
  I can't seem to do without a little sparkle...SO...Crystal Stickles was added to the center of the flower.  This is such a great flower image to color.  Just a few Copic colors scattered throughout the image and it came to life! 
I love this sentiment!!  A closer look at the torn edge and the script background stamped on the blue cardstock. 
Version 3:  BE FABULOUS!...

 Again, Used the same color palate and doodling theme.  Simple and sophisticated...with a bit of sparkle on the bee's wings and a bit of bling to finish it off. 

Evidentally, this card was considered for the cover.  I'm quite shocked but not surprised it didn't make the cover...Too white...and too simple!


A PDF of these cards that includes the supplies used is available.  Please email me or post a comment with a way to reach you if you would like a copy free of charge.

I'll return tomorrow with more peeks at my published cards. 
Kerry

Friday, July 1, 2011

America I love...

Hello Stamping friends,

Happy Fourth of July weekend! Today on the Savvy Projects blog, Design Team members are sharing cards made from one of the newest sets in the 2011 Inspiration book.  I think America I Love has to be one of my favorites!  It's great for masculine cards too!  I colored it while at seminar and held on to the image because I wasn't exactly sure how I would display the image.  I thought about a shadow box, but then decided on making a card...

What are your plans for this holiday weekend? If you don’t already know my plans, I’ll tell you all about it when I get back! Shhhhh...

What is it that you love about America? This is a BIG question. There are many things that are special about America but what is it that YOU find most precious? Is it freedom? Is it liberty? Is it the pursuit of happiness? Whatever it is, I hope you take time this special holiday weekend to reflect on all that makes USA special. As you hang your US flag and wave it proudly, as you watch fireworks or have a cook-out with family, remember those who fought so hard and continue to strengthen our country and protect our freedoms. In the months ahead, I challenge you to do something significant that will demonstrate your patriotic pride and service to our country.  Be a blessing...

To honor all those who have fought so valiantly to protect and secure my freedoms, I'll share this card. May it give YOU the inspiration to make something too..
I love to scrape my fingernail across (Yes, I prefer that over the Tim Holtz distresser-and it's cheaper too!!!) the edges of the paper to create a shabby-distressed look. 
I thought this card needed a simple and effective background...Something that spoke AMERICANA...There's nothing better to do this than a cozy quilt!  I cut 12 inchies, distressed them and stamped the starfish randomly on the squares.  The starfish in the Summer Fibi and Lilly set was the perfect stamp!  After distressing and stamping, I assembled the squares onto a white piece of cardstock and stitched around the whole thing (and in between too) to create a "quilt-like" background) Notice my sky?  It's my favorite cloud coloring technique and it's VERY simple to do...Only need one blue Copic color to create this beautiful sky.  Watch for a tutorial soon (I've gotta have REALLY good lighting though!)
To finish off the card, I added a twine bow, a button (no naked holes!) and some little Wilton Cake Stamens...They add a perfect seaside plant embellsihment.  You can also see a little bit of Stickles on those starfish...I added some on water image too. 

Hope your Fourth of July is FABULOUS!!!
Kerry

THE RECIPE:
A2 Card Base (opening on the top)
Stamps:  America I Love, Summer Fibi and Lilly
Cardstock:  Copic Xpress-It, Bazzill
Memento Tuxedo Black
Copics:  Listed later (A TON)
Crystal Stickles
Twine:  My Stash
Button:  SEI set
Wilton Stamens
Zyron Glue "Blobs" Spots
Bling:  My Stash
White sewing thread